UWP(ユニバーサルWindowsプラットフォーム)アプリでArduinoとシリアル通信をするアプリを作ろう!
その為に、まずははじめてのUWPアプリの作成にチャレンジ。
今回はArduinoとの接続を想定しているので、センサ等の情報を画面に反映するようなアプリにしてみよう。
UWPアプリはXAMLでデザインをするようだ。とはいってもVisualStudio2015ではドラッグアンドドロップでコードが生成されていくのでお手軽。まずはCanvasをつくりその中にRectangleを作ってみたら以下のようなコードが生成される。色などはプロパティで選択すればOK。
MainPage.xaml
<Page
    x:Class="MyUWP.MainPage"
    xmlns="http://schemas.microsoft.com/winfx/2006/xaml/presentation"
    xmlns:x="http://schemas.microsoft.com/winfx/2006/xaml"
    xmlns:local="using:MyUWP"
    xmlns:d="http://schemas.microsoft.com/expression/blend/2008"
    xmlns:mc="http://schemas.openxmlformats.org/markup-compatibility/2006"
    mc:Ignorable="d">

    <Grid Background="{ThemeResource ApplicationPageBackgroundThemeBrush}">
        <Canvas HorizontalAlignment="Left" Height="400" Margin="112,54,0,0" VerticalAlignment="Top" Width="800" Background="#FFBEFBDA">
            <Rectangle x:Name="Bot_A" Fill="#FF7B7BF2" Height="50" Canvas.Left="0" Stroke="Black" Canvas.Top="0" Width="70" RadiusX="20" RadiusY="20"/>
        </Canvas>
    </Grid>
</Page>
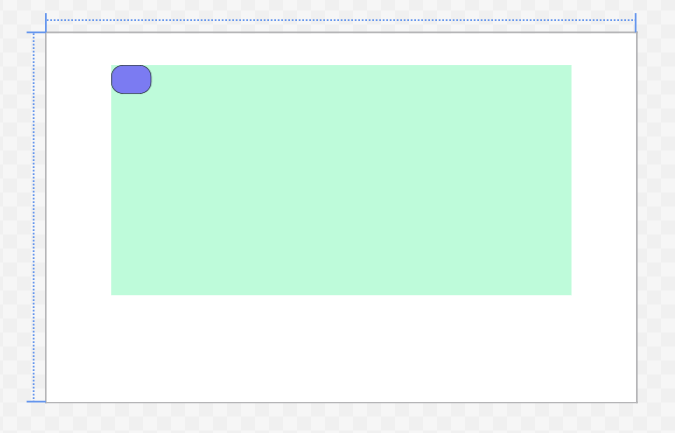
青い角丸四角の位置をプログラムで動かしてみよう。
update_display()という無限ループ関数で角丸四角を動かしてみる。
MainPage.xaml.cs
using System;
using System.Collections.Generic;
using System.IO;
using System.Linq;
using System.Runtime.InteropServices.WindowsRuntime;
using Windows.Foundation;
using Windows.Foundation.Collections;
using Windows.UI.Xaml;
using Windows.UI.Xaml.Controls;
using Windows.UI.Xaml.Controls.Primitives;
using Windows.UI.Xaml.Data;
using Windows.UI.Xaml.Input;
using Windows.UI.Xaml.Media;
using Windows.UI.Xaml.Navigation;
using System.Threading.Tasks;

// 空白ページのアイテム テンプレートについては、http://go.microsoft.com/fwlink/?LinkId=402352&clcid=0x409 を参照してください

namespace MyUWP
{
    /// <summary>
    /// それ自体で使用できる空白ページまたはフレーム内に移動できる空白ページ。
    /// </summary>
    public sealed partial class MainPage : Page
    {
        public Robot robot { get; set; }

        public MainPage()
        {
            this.InitializeComponent();

            this.robot = new Robot();
            this.robot.run();

            update_display();
        }

        public async void update_display()
        {
            for(;;)
            {
                Canvas.SetLeft(Bot_A, robot.x);
                Canvas.SetTop(Bot_A, robot.y);
                await Task.Delay(50);
            }
        }

    }
}
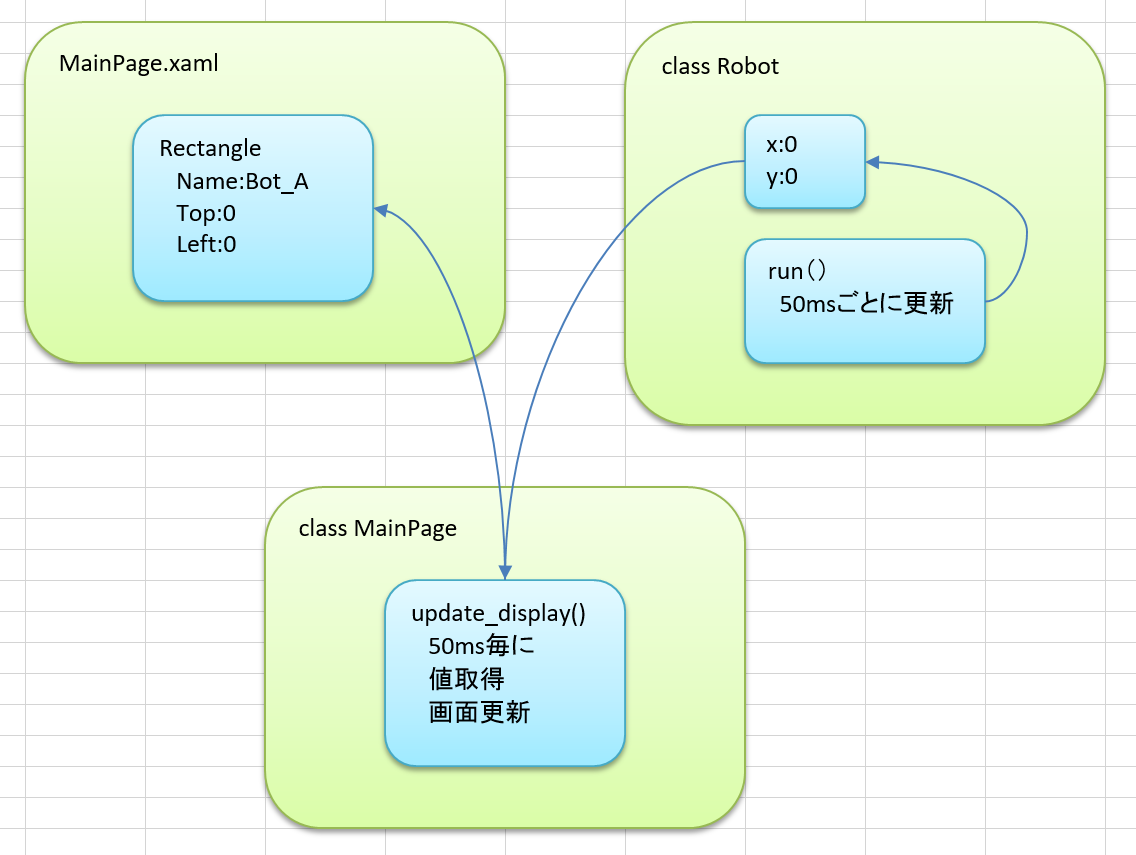
Robotクラスを作成し疑似的に随時状態が変更されているイメージ。
Robot.cs
using System;
using System.Collections.Generic;
using System.Linq;
using System.Text;
using System.Threading.Tasks;
using System.Diagnostics;

namespace MyUWP
{
    public class Robot
    {
        public int x { get; set; }
        public int y { get; set; }

        public Robot()
        {
            this.x = 0;
            this.y = 0;
        }

        public async void run()
        {
            int vx = 1;
            int vy = 1;
            int ax = 1;
            int ay = 1;
            Random rnd = new Random();

            for (int i = 0; i<20; i++)
            {
                if (i == 19)
                {
                    ax = rnd.Next(-1, 2);   //-1,0,1のどれか
                    ay = rnd.Next(-1, 2);   //-1,0,1のどれか
                    vx += ax;
                    vy += ay;
                    i = 0;
                }
                this.x += vx;
                this.y += vy;
                if (x < 0 || x > 730)  //端で折り返し
                {
                    vx = -vx;
                }
                if (y < 0 || y > 350)  //端で折り返し
                {
                    vy = -vy;
                }
                await Task.Delay(50);
            }
        }
    }
}
以下のようなイメージ。
UWPアプリでの画面更新テストアプリ成功。
次回は実際にArduinoとのシリアル通信にトライしよう!
バージョン情報
Visual Studio Community 2015, windows 10
こちらの記事もどうぞ
 2015年7月8日 IFTTTのMaker channelがいい感じ!
 2015年3月28日 IoT無線タグTWE-Lite-2525A 使ってみた C#
 2014年6月17日 無線マイコンTWE-Lite DIPで無線通信。C#編。
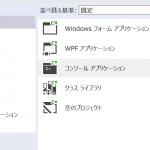 2014年12月8日 Arduinoシリアル通信 その4:exe化
 2014年6月7日 Arduino シリアル通信 その2:visual C#