バージョン情報
Arduino Uno , Arduino IDE 1.0.5 , windows 8.1
前回の続き
今回は超音波センサで測定した距離をSDカードに保存できるようにしてみた。
材料
Arduino Uno
HC-SR04 超音波距離センサーモジュール For Arduino
1.8″ TFT カラー LCD ディスプレイ miceoSDカード付
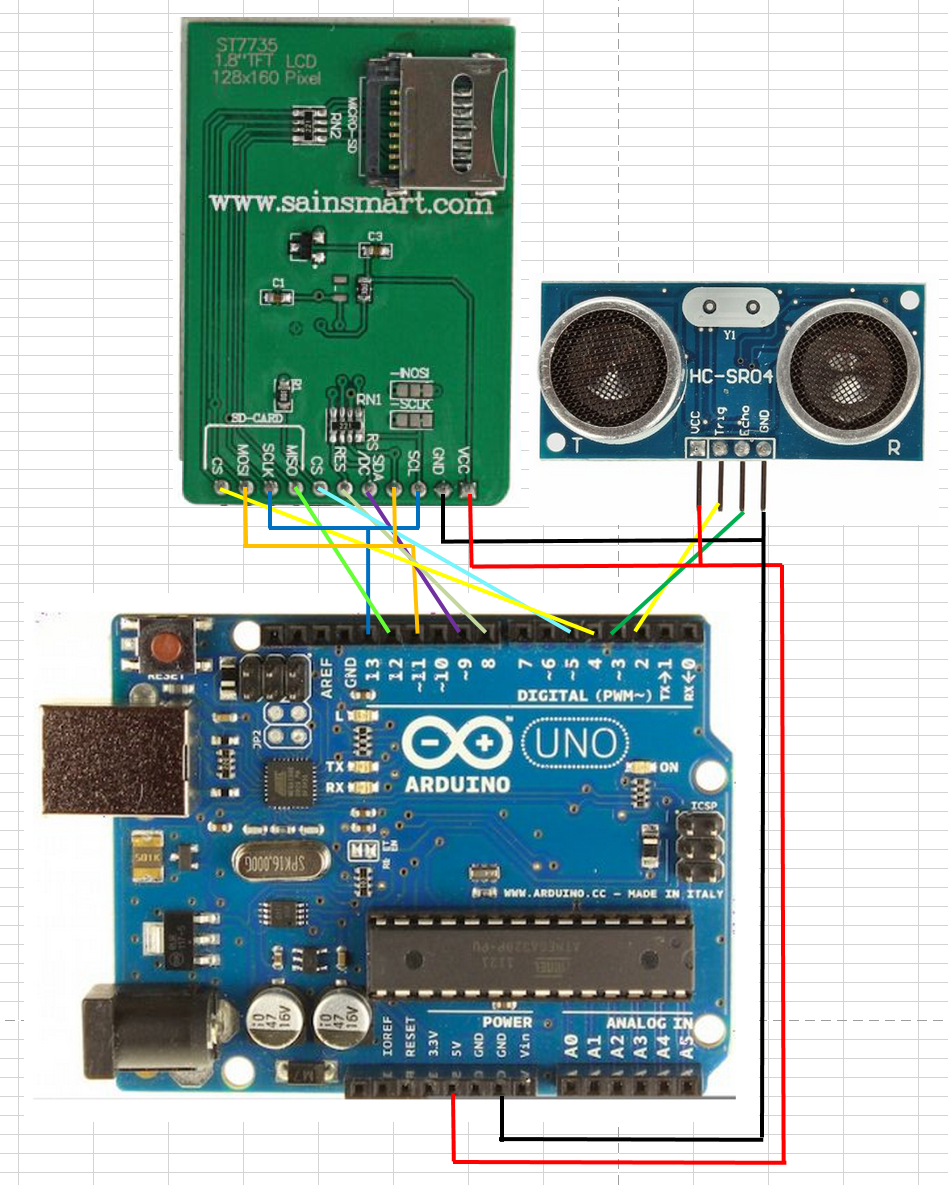
回路
前回使用した回路を一部改造。
SD.hで10番pinを使用するっぽいので、TFTのcsを5番pinに変更。
SDのcsは4番pinを使用。
11番pinがMaster Out Slave In (MOSI)
12番pinがMaster In Slave Out (MISO)
13番pinがクロック
上記の3ピンがSPIでは共用できるようだ。
ソースコード
Arduinoライブライから “TFT.h” “SPI.h” “SD.h”をありがたく使用させて貰う。
#include <TFT.h>  // Arduino LCD library
#include <SPI.h>
#include <SD.h>

// pin definition for the Uno
#define cs_TFT   5
#define dc   9
#define rst  8
#define cs_SD   4
#define buf_SD 10
#define TrigPin 2
#define EchoPin 3

// create an instance of the library
TFT TFTscreen = TFT(cs_TFT, dc, rst);

// char array to print to the screen
char sensorPrintout[7];

//const int TrigPin = 2;
//const int EchoPin = 3;
float cm;
int mm;
String str_buf = "string";

void setup() {

  delay(1000);

  pinMode(TrigPin, OUTPUT);
  pinMode(EchoPin, INPUT);
  pinMode(buf_SD, OUTPUT);

  // see if the card is present and can be initialized:
  if (!SD.begin(cs_SD)) {
    return;
  }

  // Put this line at the beginning of every sketch that uses the GLCD:
  TFTscreen.begin();
  TFTscreen.background(0, 0, 0);

  // write the static text to the screen
  TFTscreen.stroke(255,255,255);
  TFTscreen.setTextSize(2);
  TFTscreen.text("Distance :\n ",0,0);

  // ste the font size very large for the loop
  TFTscreen.setTextSize(3);


  delay(1000);
}

void loop() {

  digitalWrite(TrigPin, LOW); //Low high and low level take a short time to TrigPin pulse
  delayMicroseconds(2);
  digitalWrite(TrigPin, HIGH);
  delayMicroseconds(10);
  digitalWrite(TrigPin, LOW);

  cm = pulseIn(EchoPin, HIGH) / 58.0; //Echo time conversion into cm
  mm = int(cm * 10.0);

  if (mm < 20 || mm > 4000){
    str_buf = "----";
  }else{
    str_buf = String(mm) + " mm";
    int len_str = str_buf.length();
    for (int iii=7; iii>len_str;iii--){
      str_buf = ' ' + str_buf;
    }
  }

  // open the file. note that only one file can be open at a time,
  // so you have to close this one before opening another.
  File dataFile = SD.open("datalog.txt", FILE_WRITE);
  // if the file is available, write to it:
  if (dataFile) {
    dataFile.println(str_buf);
    dataFile.close();
  }


  // convert the reading to a char array
  str_buf.toCharArray(sensorPrintout, 8);

  // set the font color
  TFTscreen.stroke(255,255,255);
  // print the sensor value
  TFTscreen.text(sensorPrintout, 0, 20);
  // wait for a moment
  delay(250);
  // erase the text you just wrote
  TFTscreen.stroke(0,0,0);
  TFTscreen.text(sensorPrintout, 0, 20);
}
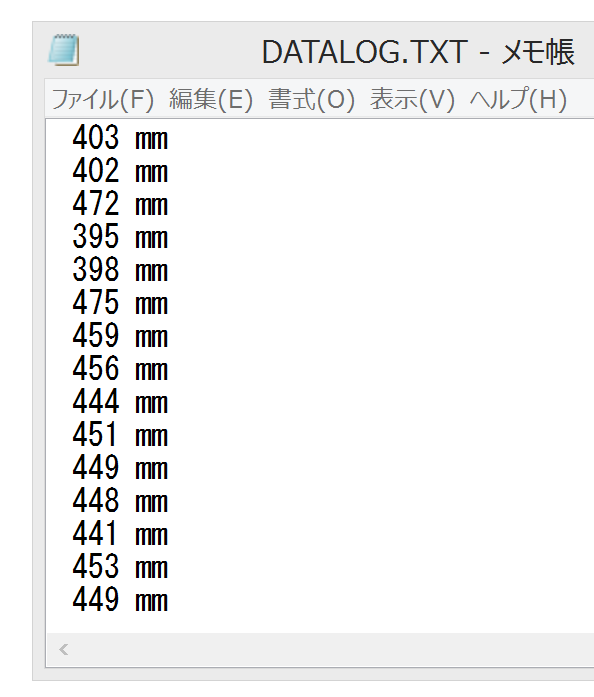
動作確認
SDカードをPCに入れてファイルを確認。
こちらの記事もどうぞ
 2014年12月5日 Arduinoシリアル通信 その3:python
 2014年10月15日 Arduino + TFT液晶 + 超音波センサ
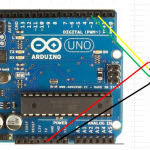 2014年10月11日 Arduino + 1Sheeld で遊ぼう。その3。 LCD + 超音波センサ
 2014年6月3日 Arduino シリアル通信 その1:processing 続き
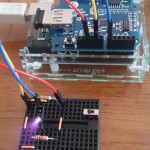 2014年5月27日 Arduino シリアル通信 その1:processing